Create Zynq boot image using Xilinx SDK
This demo shows you how to create BOOT.bin with an AXI GPIO bare-metal application and how to boot the EDGE FPGA board from the SD card and QSPI flash
The Vivado project and the SDK application project created in the previous tutorial.
Follow the below steps to create the boot image
1. Open the SDK application project
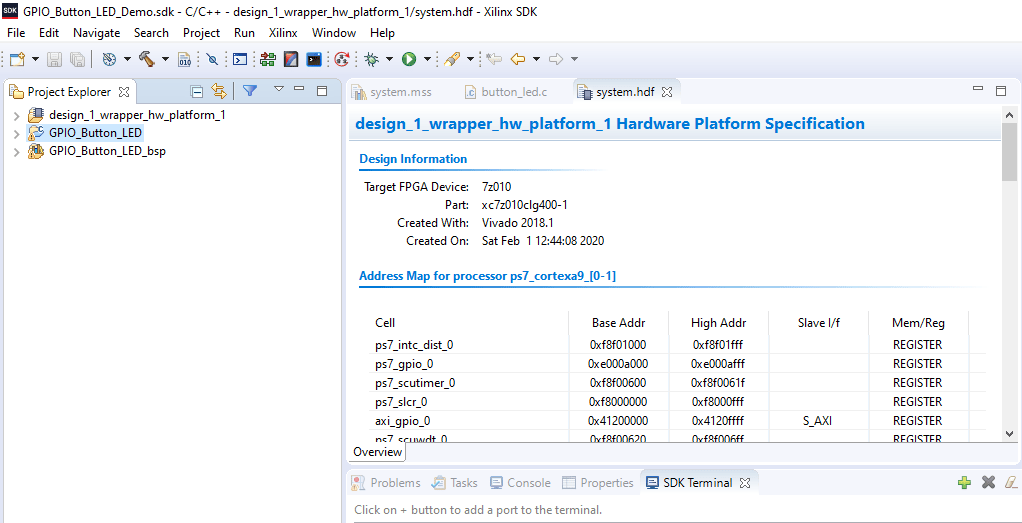
2. Create the first stage boot loader (FSBL) that will load the bitstream and GPIO_Button_led.elf
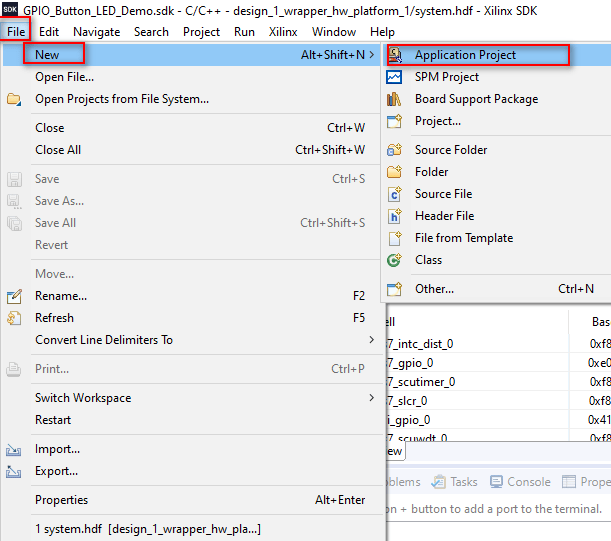
a. Click on
File => New => Application project
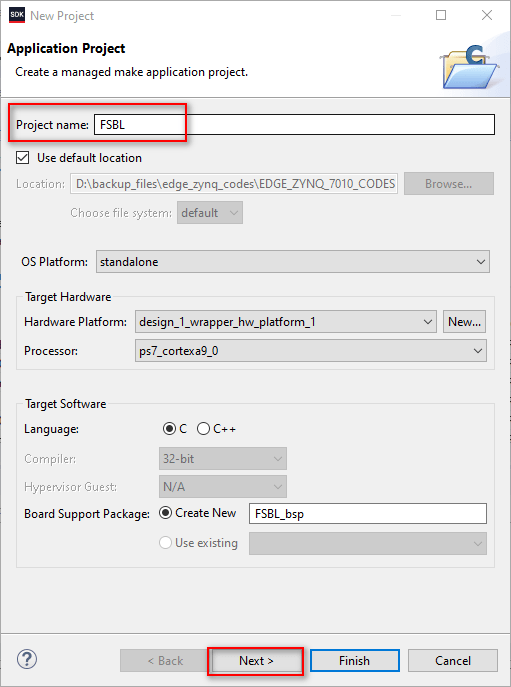
3. Enter the project name and click next as shown in below picture
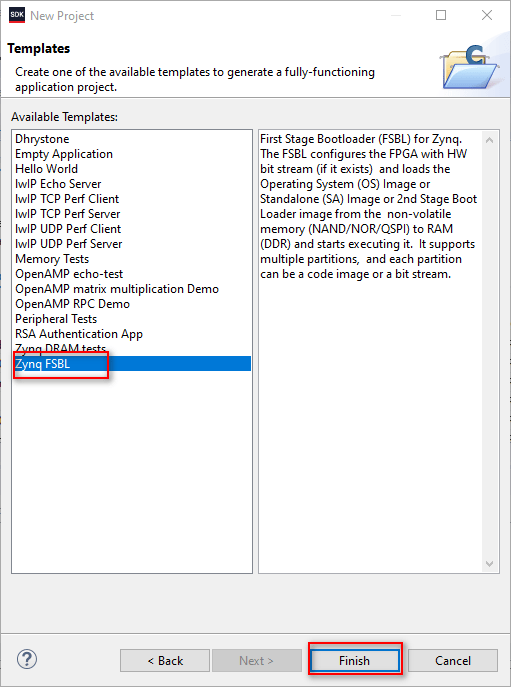
4.select on Zynq FSBL and click on Finish
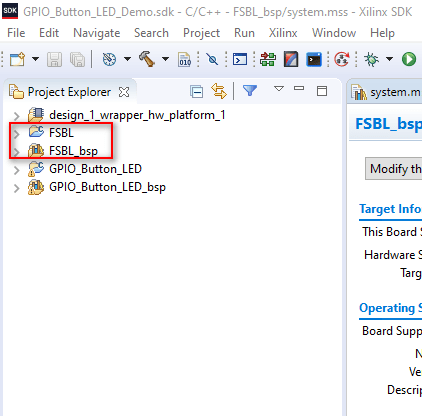
Now you can see that FSBL application project is created
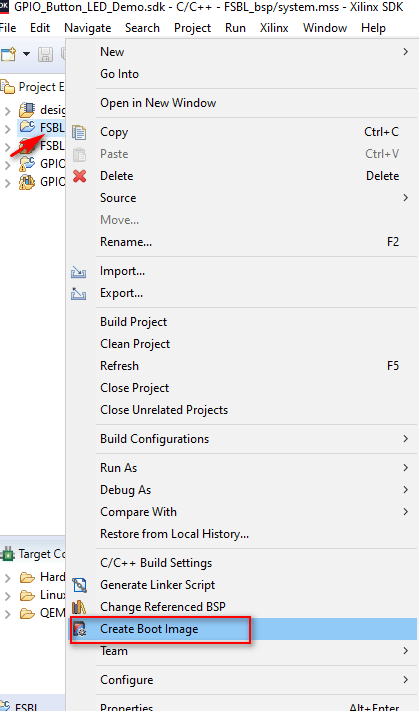
Right click on the FSBL and select Create Boot image as shown below.
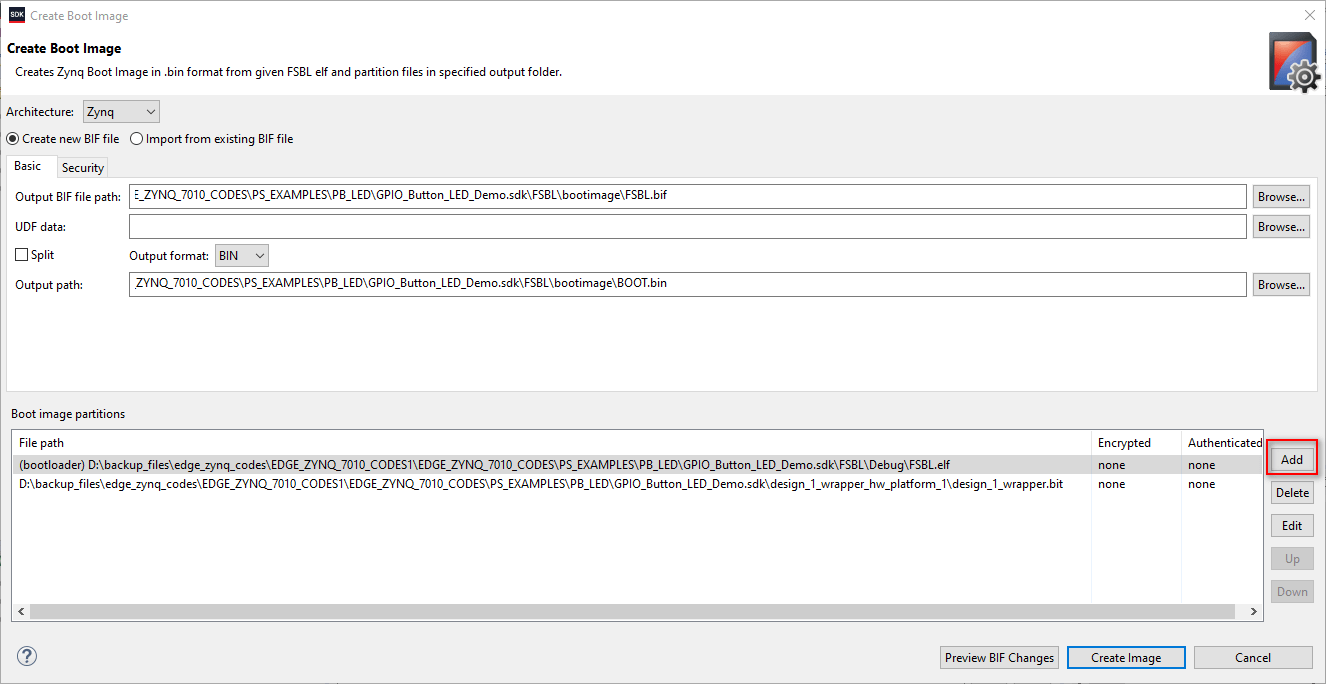
Make sure that the picture below matches and click Add
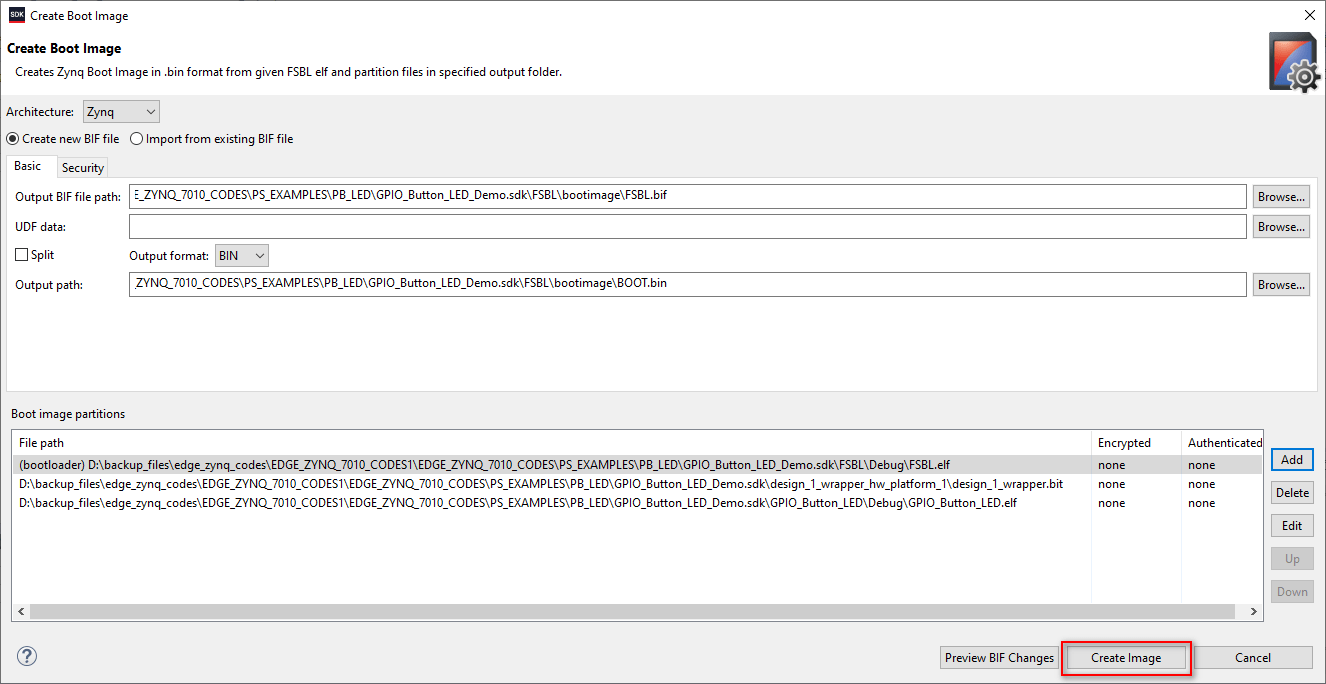
Browse to GPIO-Button_LED.elf in your SDK application
In my case which is in
GPIO_Button_LED_Demo.sdk\GPIO_Button_LED\Debug

Make sure that the partition type is datafile and click Ok

Click Create Image
Now you can see the Build Finished and Bootgen command execution is done

The creation boot image has completed
Boot from QSPI Flash
Connect the EDGE FPGA board
As shown below Click on
Xilnx => Program Flash
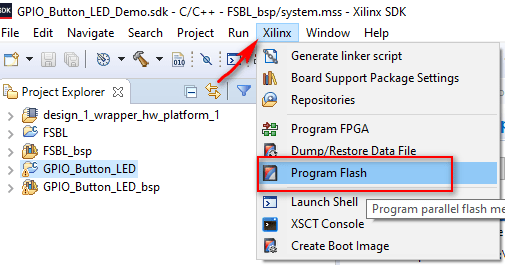
a. Browse to the image file (Boot.bin) that we created before
b. Browse to FSBL file (FSBL.elf)
c. Check the boxes as shown below
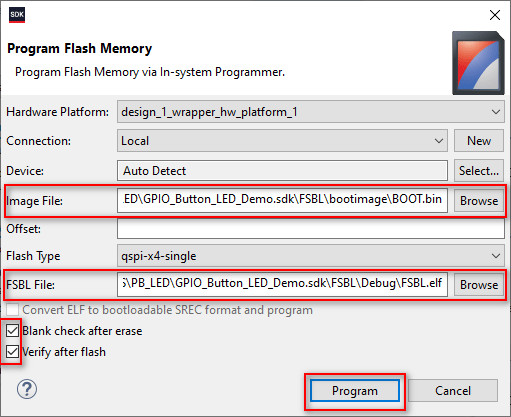
You should see the QSPI flash memory successful message on console
The boot image would be saved on the QSPI memory
To check the Flash memory,Change the jumper

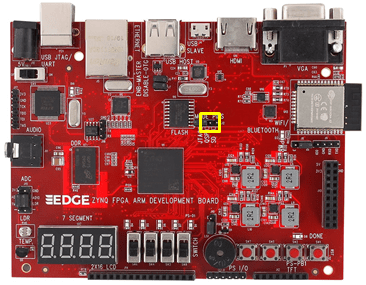
Press the reset button
Done LED would be on
Now, you can check your application output
Boot from SDCARD
a. Take the FAT32 formatted SDcard
b. Copy the boot.bin from the below your application path

c. Paste it on the SDcard
d. Once it is completed eject the SDcard
e. Make sure that the EDGE zynq board is off and plug the SD card into the board
f. Set the sd boot mode by placing the jumper on sd pin

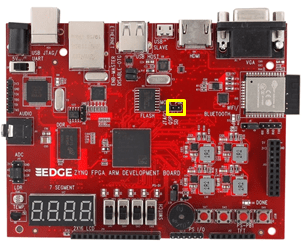
f. Press the reset button
g. Done LED would be on
h. Now, you can check your application
